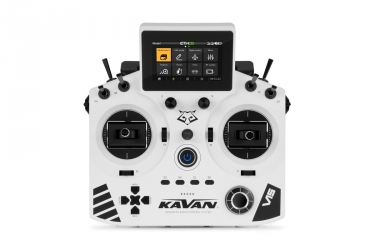
How to change the mode of the KAVAN V15 transmitter?
This brief guide walks you through the procedure, which takes just a few minutes to complete.
Be careful manipulating the split shell. Pay extra attention to not damage the antennas.
Tighten the tension and ratcheting strip screws so the movement resistance of the sticks matches your preference.
Step 1
First, remove the battery tray cover and unplug the battery. Then, unscrew the four screws on the rear shell and slowly begin to remove it, starting from the bottom side. Be careful not to break the two plastic pins behind the display.
Step 2
Remove the side rotary sliders and place them into the mounts on the front shell so they don’t get in the way during the replacement. Unplug the flex cable by unlocking it upwards/towards you.
Step 3
Unscrew the self-centring spring lock from the current throttle stick. Lifting the spring arm upwards makes the process easier.
Step 4
Now loosen the ratcheting strip [1] (adjusts the ratchet strength) and the tension strip [2] (the more you loosen it, the easier it is to move the stick), then check that the gimbal can move freely in all directions.
Step 5
Insert and screw in the self-centring spring lock into the other gimbal. Again, lifting the spring arm will help you. On the same stick, loosen the self-centring spring screw (the less it is tightened, the weaker the centring force is).
Step 6
Adjust the screws on the ratcheting strip [1] (adjusts the ratchet strength) and the tension strip [2] (the tighter it is, the more force is needed to move the stick). Tighten the self-centring spring screw on the opposite side to centre the stick.
Step 7
Check that both gimbals can move freely and that the tension and ratcheting feel right to you; if not, go back one step and loosen or tighten the screws of the ratcheting and tension strip as needed.
Step 8
Plug the flex cable back in and make sure it is properly locked by “clicking” it into place. The flex cable must be connected straight, so adjust the connection carefully if necessary.
Step 9
Carefully pop the rear shell back in – keep in mind that the connectors must be properly centred. After checking that everything fits correctly, screw in the four screws on the rear shell. Then plug the battery back in and close the battery case cover.
Step 10
Turn on the transmitter. Go to the “System” menu and open the “Sticks” menu. Change the stick mode – in this case, from “Mode 2” to “Mode 1”. Check the operation of the channels in the “Outputs” in the “Model” menu.
Congratulations. The mode is now changed.
If you need a more detailed tutorial, watch this video tutorial, where you can find all the moves described above step by step.


